
Scanning at a venue
How the scanner works in venue mode, with concert days, green, amber and red results, badges and wristbands, and what to tell the door staff.
In venue mode, the scanner checks crew and guests in for one particular concert day and shows whether the person is accredited. This guide is for you who set up the door and brief the staff.
Otherwise the scanner works as usual: who may scan, search, notes and error messages are in Scanner / Scanning tickets. Who is accredited is in Accreditation at a venue.
Choose the concert day
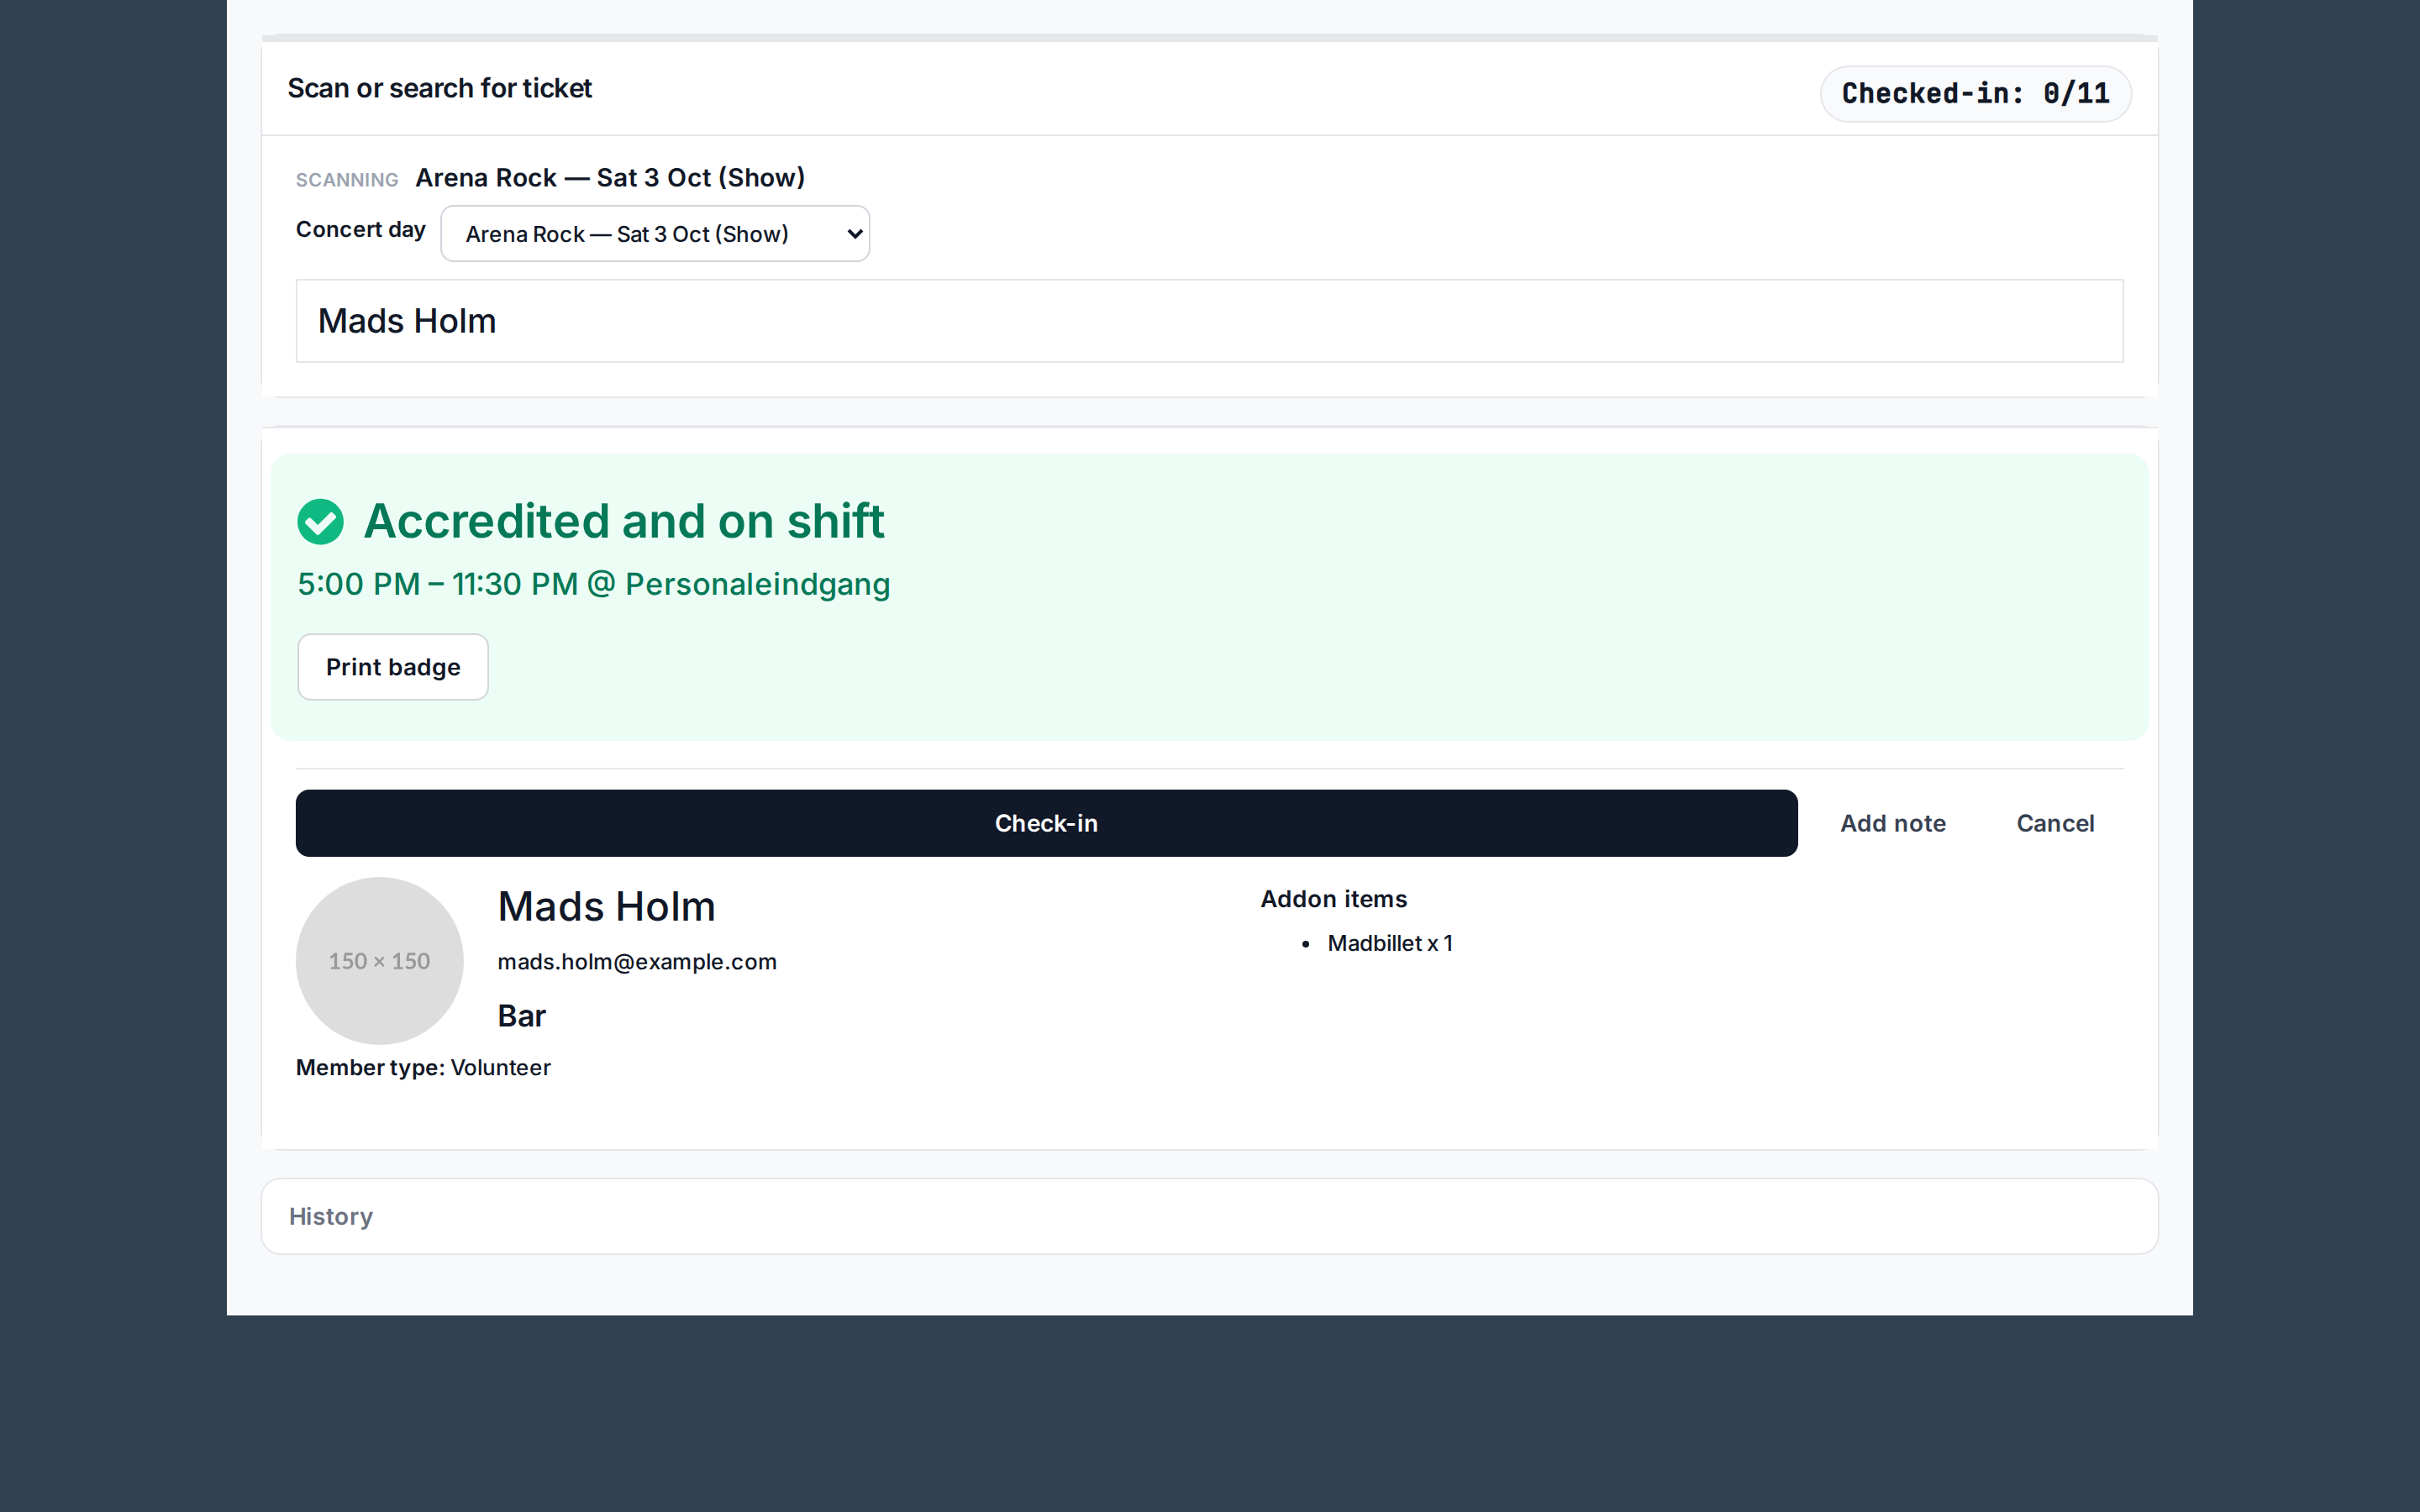
At the top of the scanner you see Scanning and the concert day you are scanning for, for example "Arena Rock — Thu 12 Mar (Show)". Everything the scanner shows applies to that concert day.
- Concert day is a list of the concert days from yesterday to 14 days ahead.
- One concert today: It is chosen in advance.
- No concert today: The next concert day is chosen in advance, if there is only one concert that day.
- Several concerts on the same day: None is chosen. Choose yourself.
If the day was chosen in advance, it says "Assumed. Is this the right night?". Click Confirm, or choose another day under Concert day. The scanner remembers the choice for as long as you are logged in to the browser.
If you try to check someone in without a concert day, it says "Select concert day".
Checked-in at the top shows how many have been checked in that day, out of how many are expected. Expected is everyone with a shift on the concert that day plus everyone on accreditation lists that cover the concert.

Green, amber or red
When you scan a ticket, the scanner shows a result in colour:
| Colour | The text | What the staff do |
|---|---|---|
| Green | Accredited and on shift with the shift's time and meeting point | Check the person in. |
| Green | Accredited for this concert with the list's name | Check the person in. |
| Amber | Accredited, not on shift today | The person may come in, but has no shift today. Check in if it makes sense. |
| Red | Not accredited for this concert | The person doesn't get in. Call an admin. |
Below the result you see the person's name, picture, teams, member type and products. History at the bottom can be expanded and shows everything that has happened to the ticket.
Check the person in
- Green and amber: Click Check-in, or press Enter.
- Red: The staff only see the Flag for admin review: this does not admit them button. An admin can let the person in anyway by clicking Check-in and typing a Reason. Without a reason it says "A reason is required to override a red result."
A person can only be checked in once per concert day. If you scan the person again the same day, it says "This person is already checked in for this concert day.", and the person can't be checked in again. On the next concert day the person can be checked in again.
If the ticket isn't valid, for example because the person is blacklisted or deleted, there is no Check-in button.
Flag for admin review
Flag for admin review: this does not admit them is used when the staff turn away a red person and want to make an admin aware of it:
- Click the button.
- Type why the person was turned away, and click OK. Without a note the flag isn't saved.
- The scanner shows "Flagged for admin review".
The flag and the note are saved in Crewstack. The person isn't checked in.
Badge and wristband
Each concert day's Credential policy decides what the scanner offers at check-in. If the day has no choice, the default under General settings is used. See Venue mode: concerts and concert days.
- None: only Check-in.
- Printed badge: the Print badge button checks the person in and opens the badge in a new tab. The badge shows the concert's name, the day type, "Valid" with the date, the person's name and a QR code. Print it from the browser.
- Wristband: the Issue wristband button checks the person in and opens the Connect chip card window. Scan the wristband's chip into the field, and click Connect chip to user.
- Operator choice: both buttons are shown.
The buttons aren't shown when the person is already checked in that day, or when the result is red and you aren't an admin.
Remove a check-in
If a person was checked in by mistake, an admin can remove it:
- Scan the person with the same concert day chosen.
- Click Remove check-in.
- Type a reason when asked "Why are you removing this check-in?".
The check-in for that day is removed, and the person can be checked in again. History shows "Venue check-in removed by …" with the reason.
Brief the staff
Go through this with the door team before opening:
- Check that Scanning shows the right concert and day. Click Confirm.
- Green and amber: check in. Red: don't check in, call an admin.
- Use Flag for admin review: this does not admit them with a short note when you turn someone away.
- Print a badge or issue a wristband when the button is there.
- Use Add note for anything unusual.
Pitfalls
- The Crewstack app's scanner doesn't know about concert days. The app does an ordinary check-in without checking accreditation and without a concert day. Use the scanner in the browser at a venue.
- The reports don't count them. Check-ins and Product check-ins under Reports don't show check-ins on concert days. On the person's profile the check-in appears under Activity as "Checked in …", but not next to Checked in at. See Check-in reports.
- Guest List Admins can't override red. They see the Check-in button on a red person, but it doesn't go through. It takes an admin or super admin. The same goes for Remove check-in.
- Everyone is red. The wrong concert day is chosen. Check Scanning at the top.
- Partial handout isn't used. The Hand out products window doesn't open in venue mode.
Didn't find the answer? Write to support@crewstack.io.