
Scanner / Scanning tickets
How to set up scanning, give people access, use partial handout and brief the entrance staff.
With the scanner you check crew members and guests in at the entrance and see what each person should be handed. This guide is for you if you set up scanning and brief the entrance staff.
Who can scan?
The scanner requires the event to use tickets. These people can scan:
- admins and super admins
- Guest List Admins
- anyone who has the Scanner product.
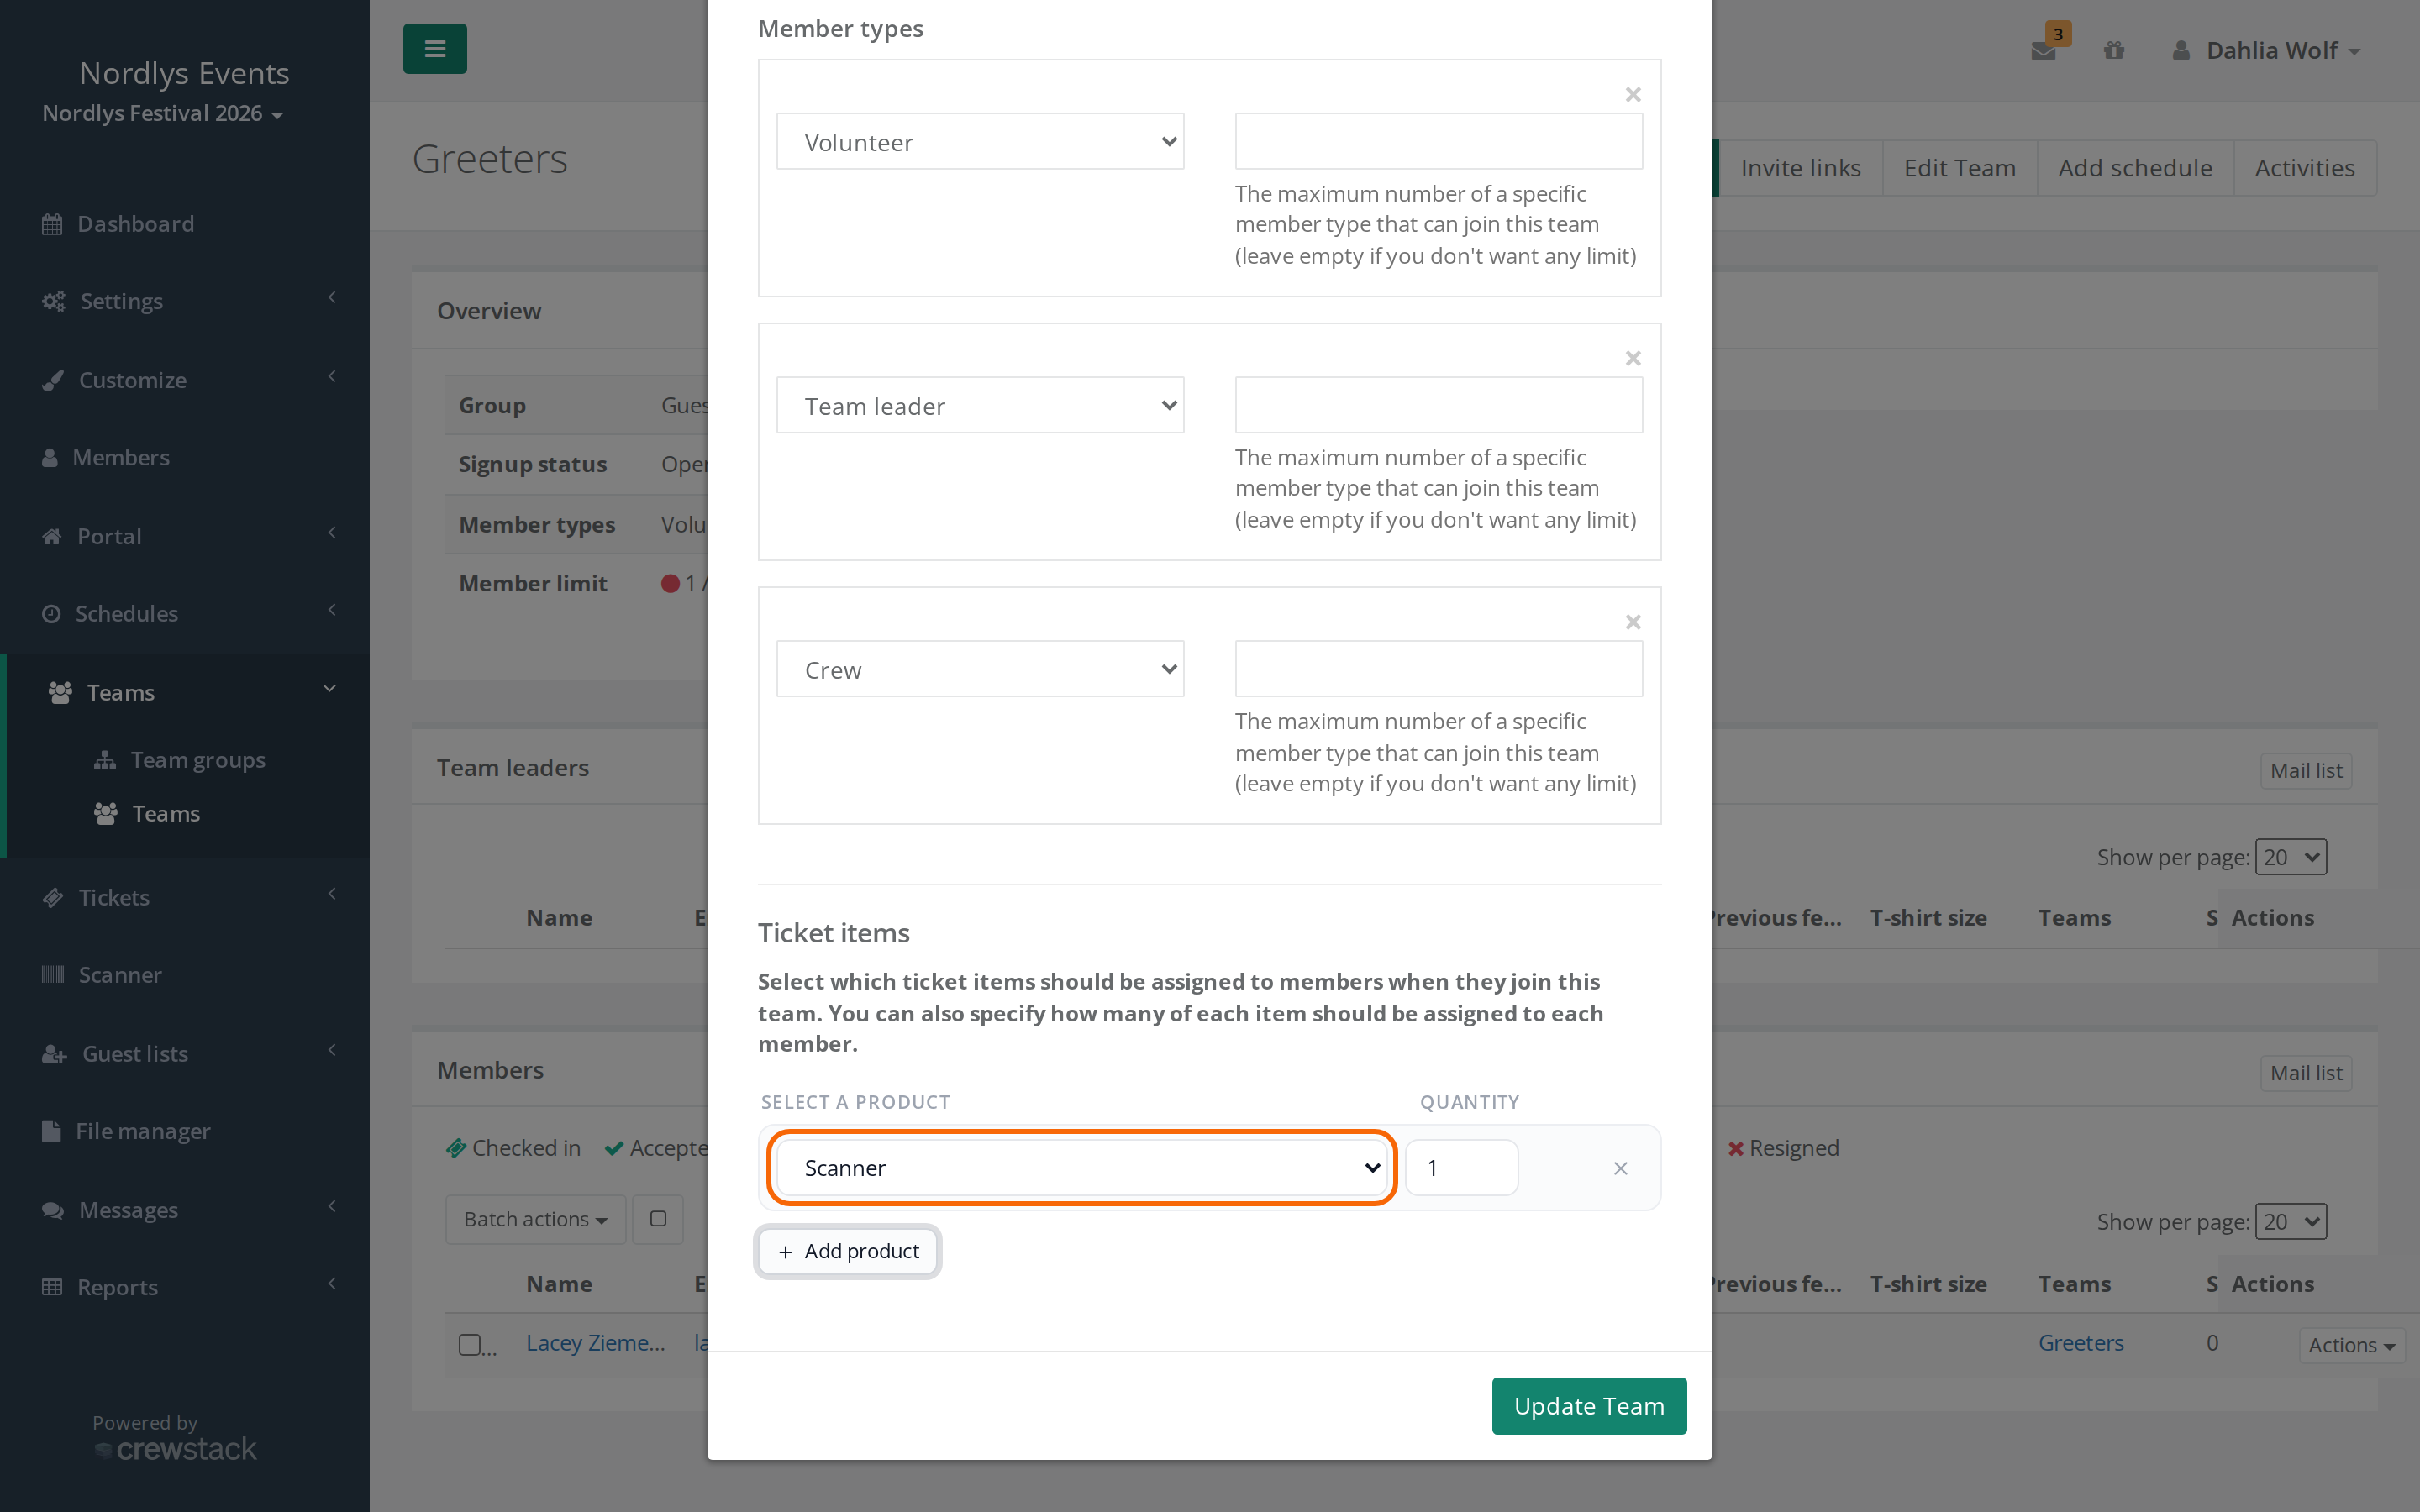
Scanner is a system product. The easiest way to give it to a whole entrance team is to put it on the team:
- Go to the team and choose to edit it.
- Click Add product in the products field.
- Choose Scanner in the System item group and save.
Everyone on the team now gets Scanner in the menu. You can also give the product to a whole member type under Ticket items on the member type.
The scanner in the browser
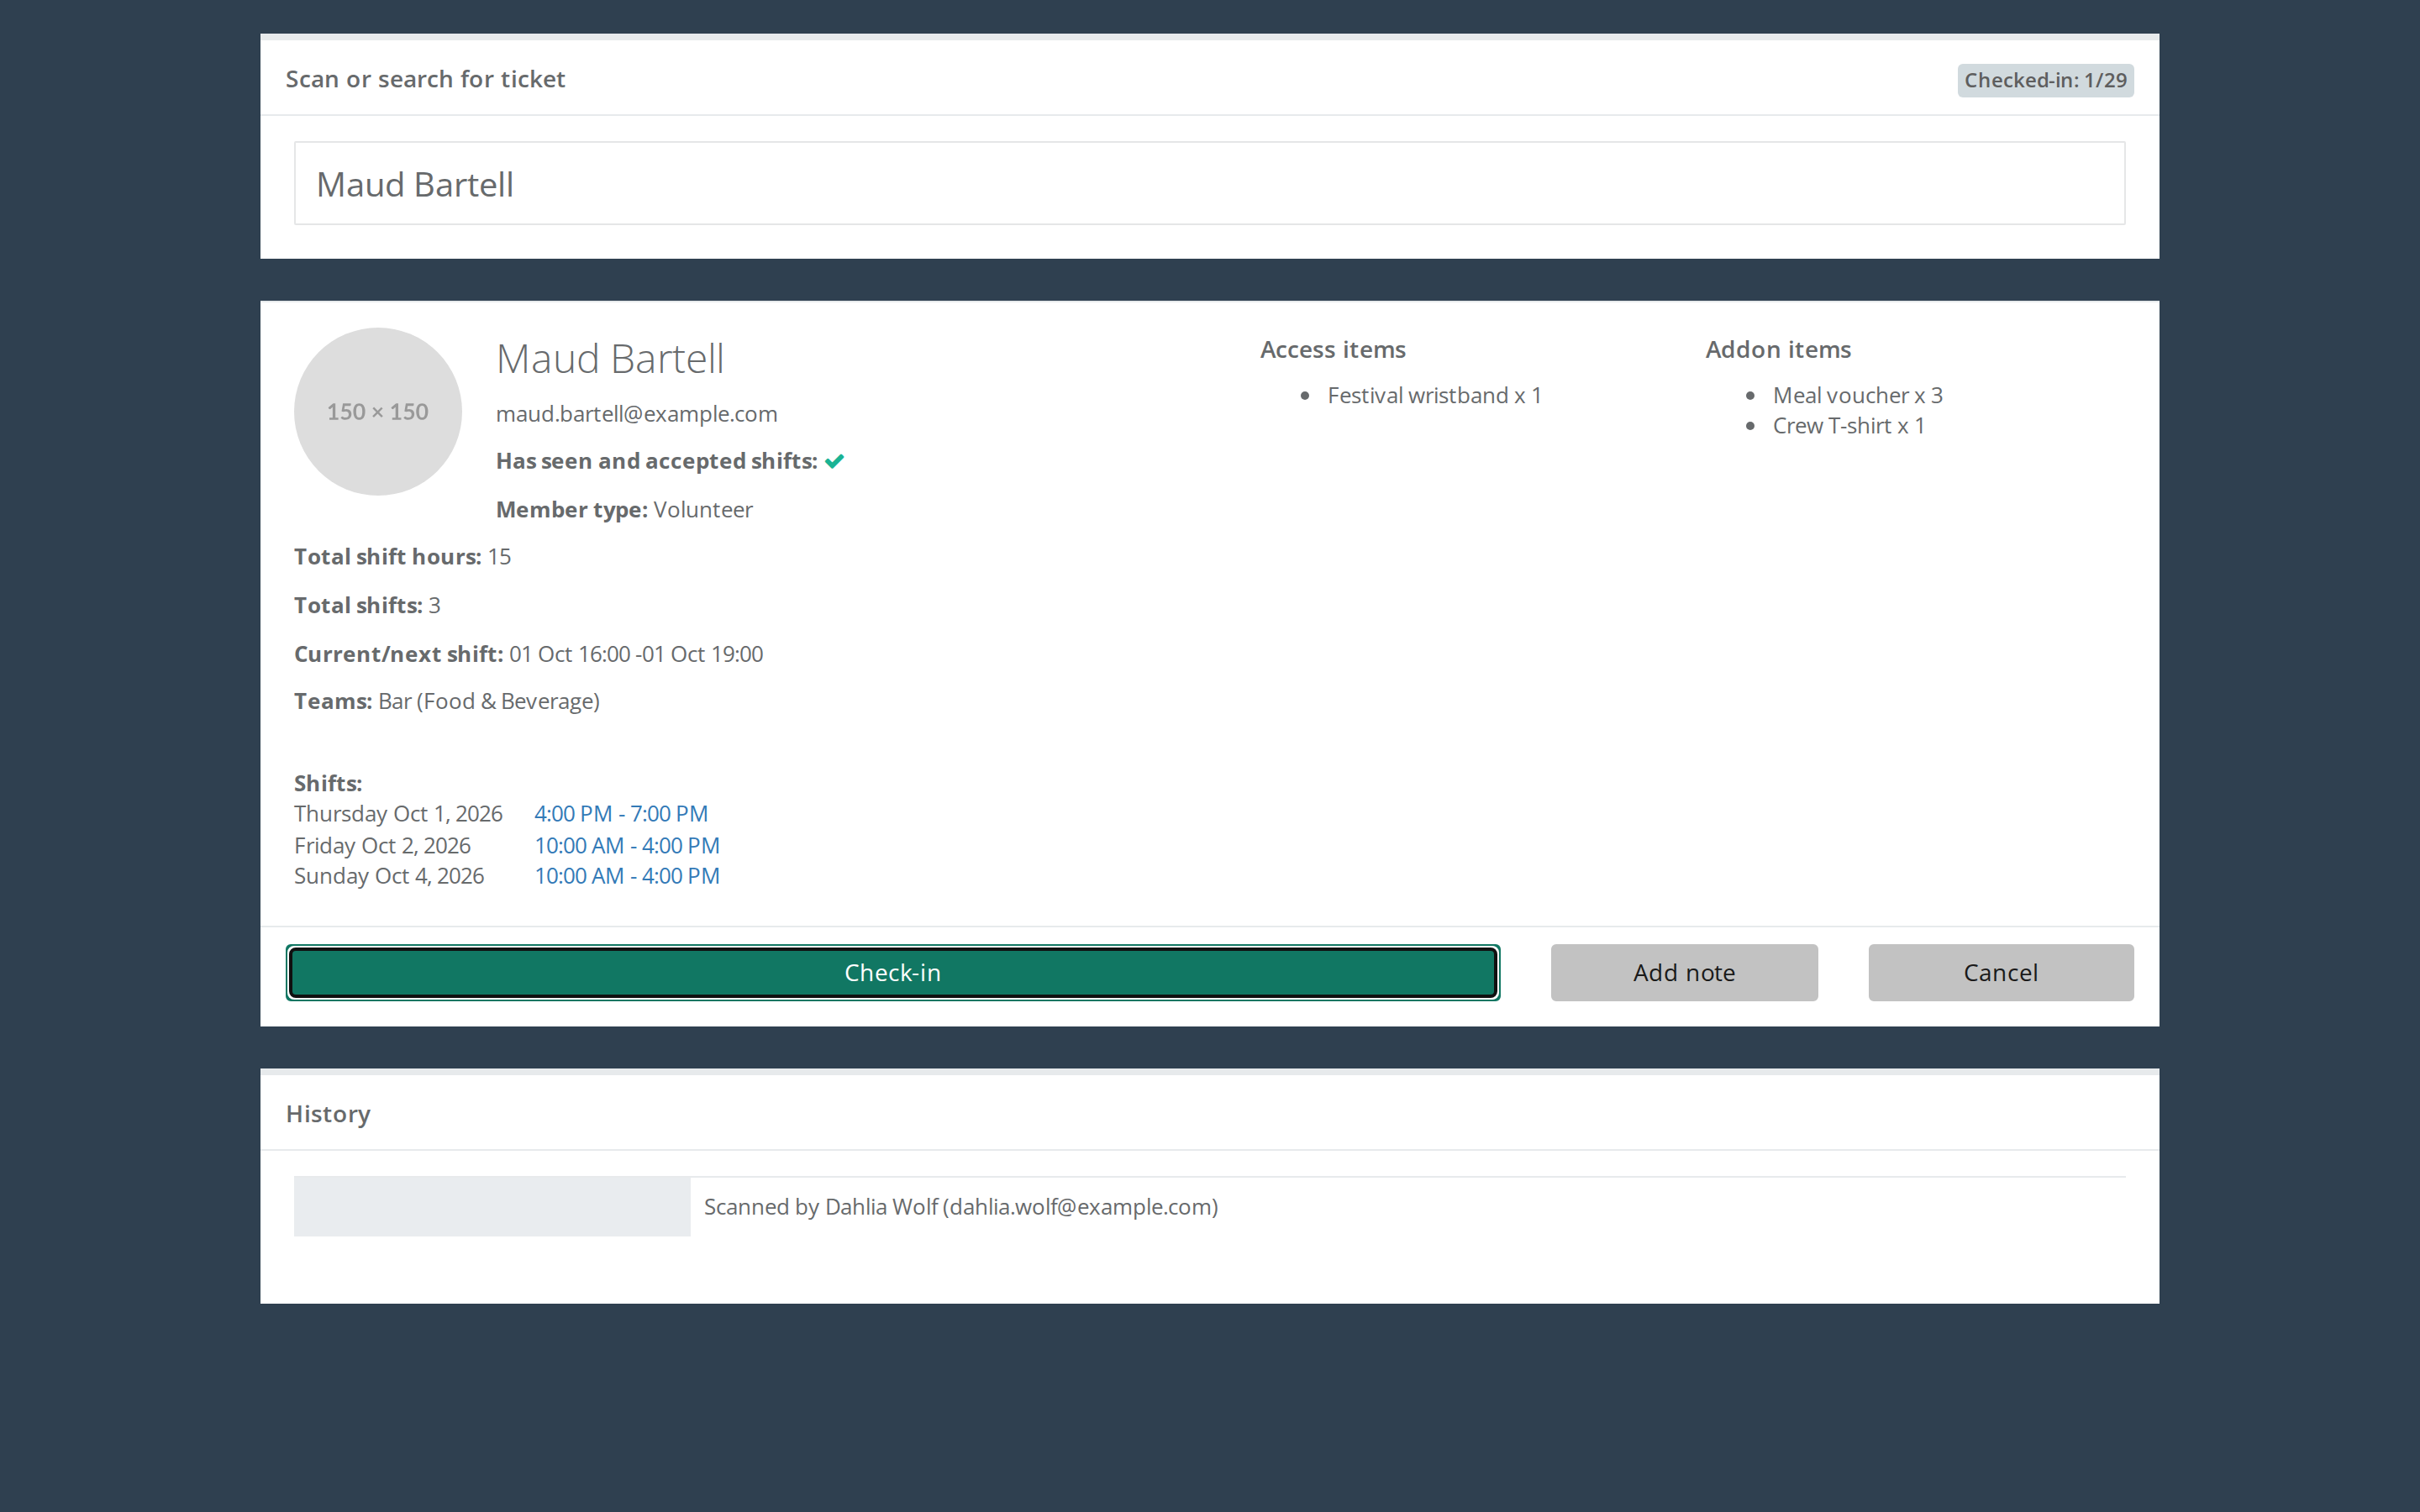
Click Scanner in the menu. The scanner works on a computer, tablet or phone with an internet connection.
- Scan the ticket with a barcode scanner, or type the barcode in the Barcode, name or email field. You can also search by name or email and pick the person from the list.
- Check the person and the products on screen.
- Click Check-in, or press Enter. The screen clears and you are ready for the next person.
A barcode scanner that behaves like a keyboard (USB or Bluetooth) works straight away. After a scan the cursor sits on Check-in, so pressing Enter checks the person in.
At the top, Checked-in shows the number of checked-in tickets out of all issued tickets.
What the scanner shows
For a crew member: profile picture, name and email, Has seen and accepted shifts, Member type, Total shift hours, Total shifts, Current/next shift, Teams and the person's Shifts. Data fields set to show in the scanner appear below.
For a guest: name and email, Comment, Guestlist group and Guest list.
For both, the scanner shows the products the person should be handed, such as wristbands and meal vouchers. At the bottom, History lists everything that happened to the ticket: scans, check-ins, handouts and notes.
When something is wrong
The scanner shows a red box if the ticket isn't valid:
- Ticket already checked-in: the button changes to Check-in anyway!. Check whether the person has already entered.
- Ticket not paid: the guest has to pay before the ticket works.
- Ticket blacklisted: the person is blacklisted.
- Ticket not valid - owner deleted: the person or guest has been deleted.
- Ticket not found: the barcode doesn't exist in this event.
An invalid ticket has no Check-in button.
Notes and remove check-in
- Add note: write a note on the ticket, for example "Got a replacement wristband". The note appears in History.
- Remove check-in: shown when the ticket is checked in. You are asked for a reason, which is saved in History. Only admins and guest list admins can remove a check-in. For anyone else it fails.
- Cancel: clear the screen without checking in.
Partial handout
If you hand things out in several places, such as wristbands at the entrance and meal vouchers in the crew tent, the scanner can record each product separately.
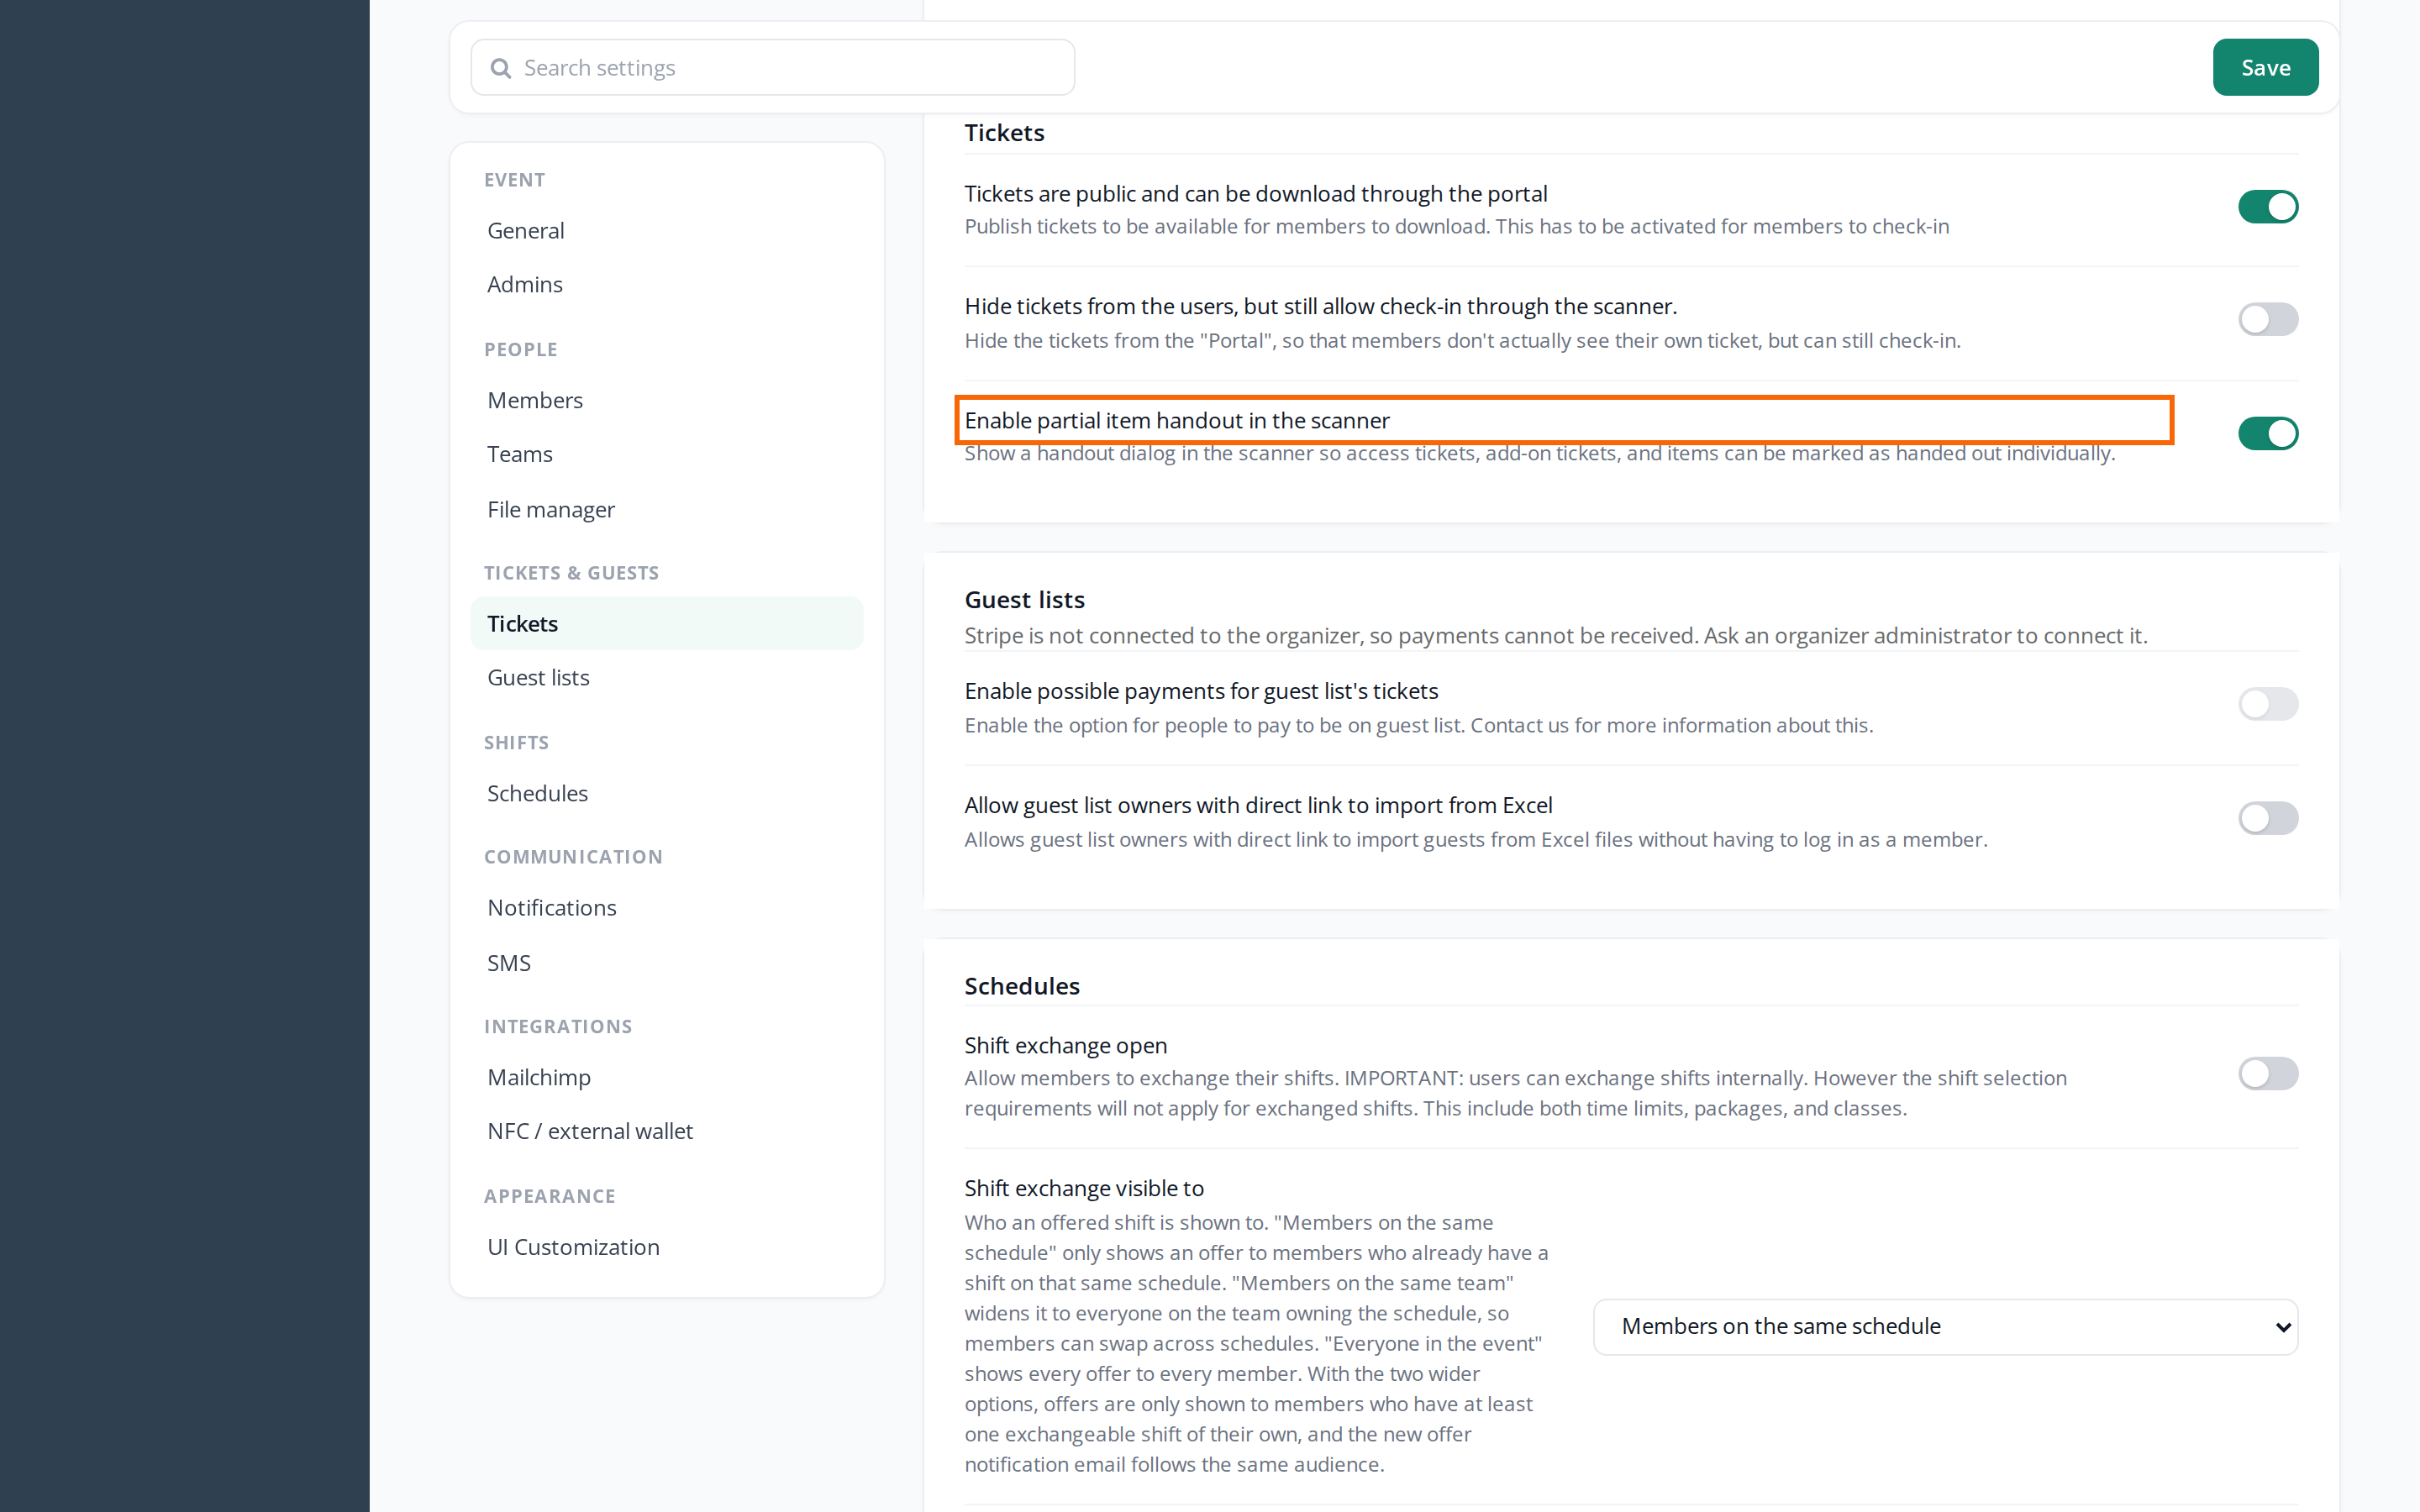
Switch it on (requires a super admin):
- Go to Settings > General settings.
- Tick Enable partial item handout in the scanner under Tickets.
- Save.
How it works:
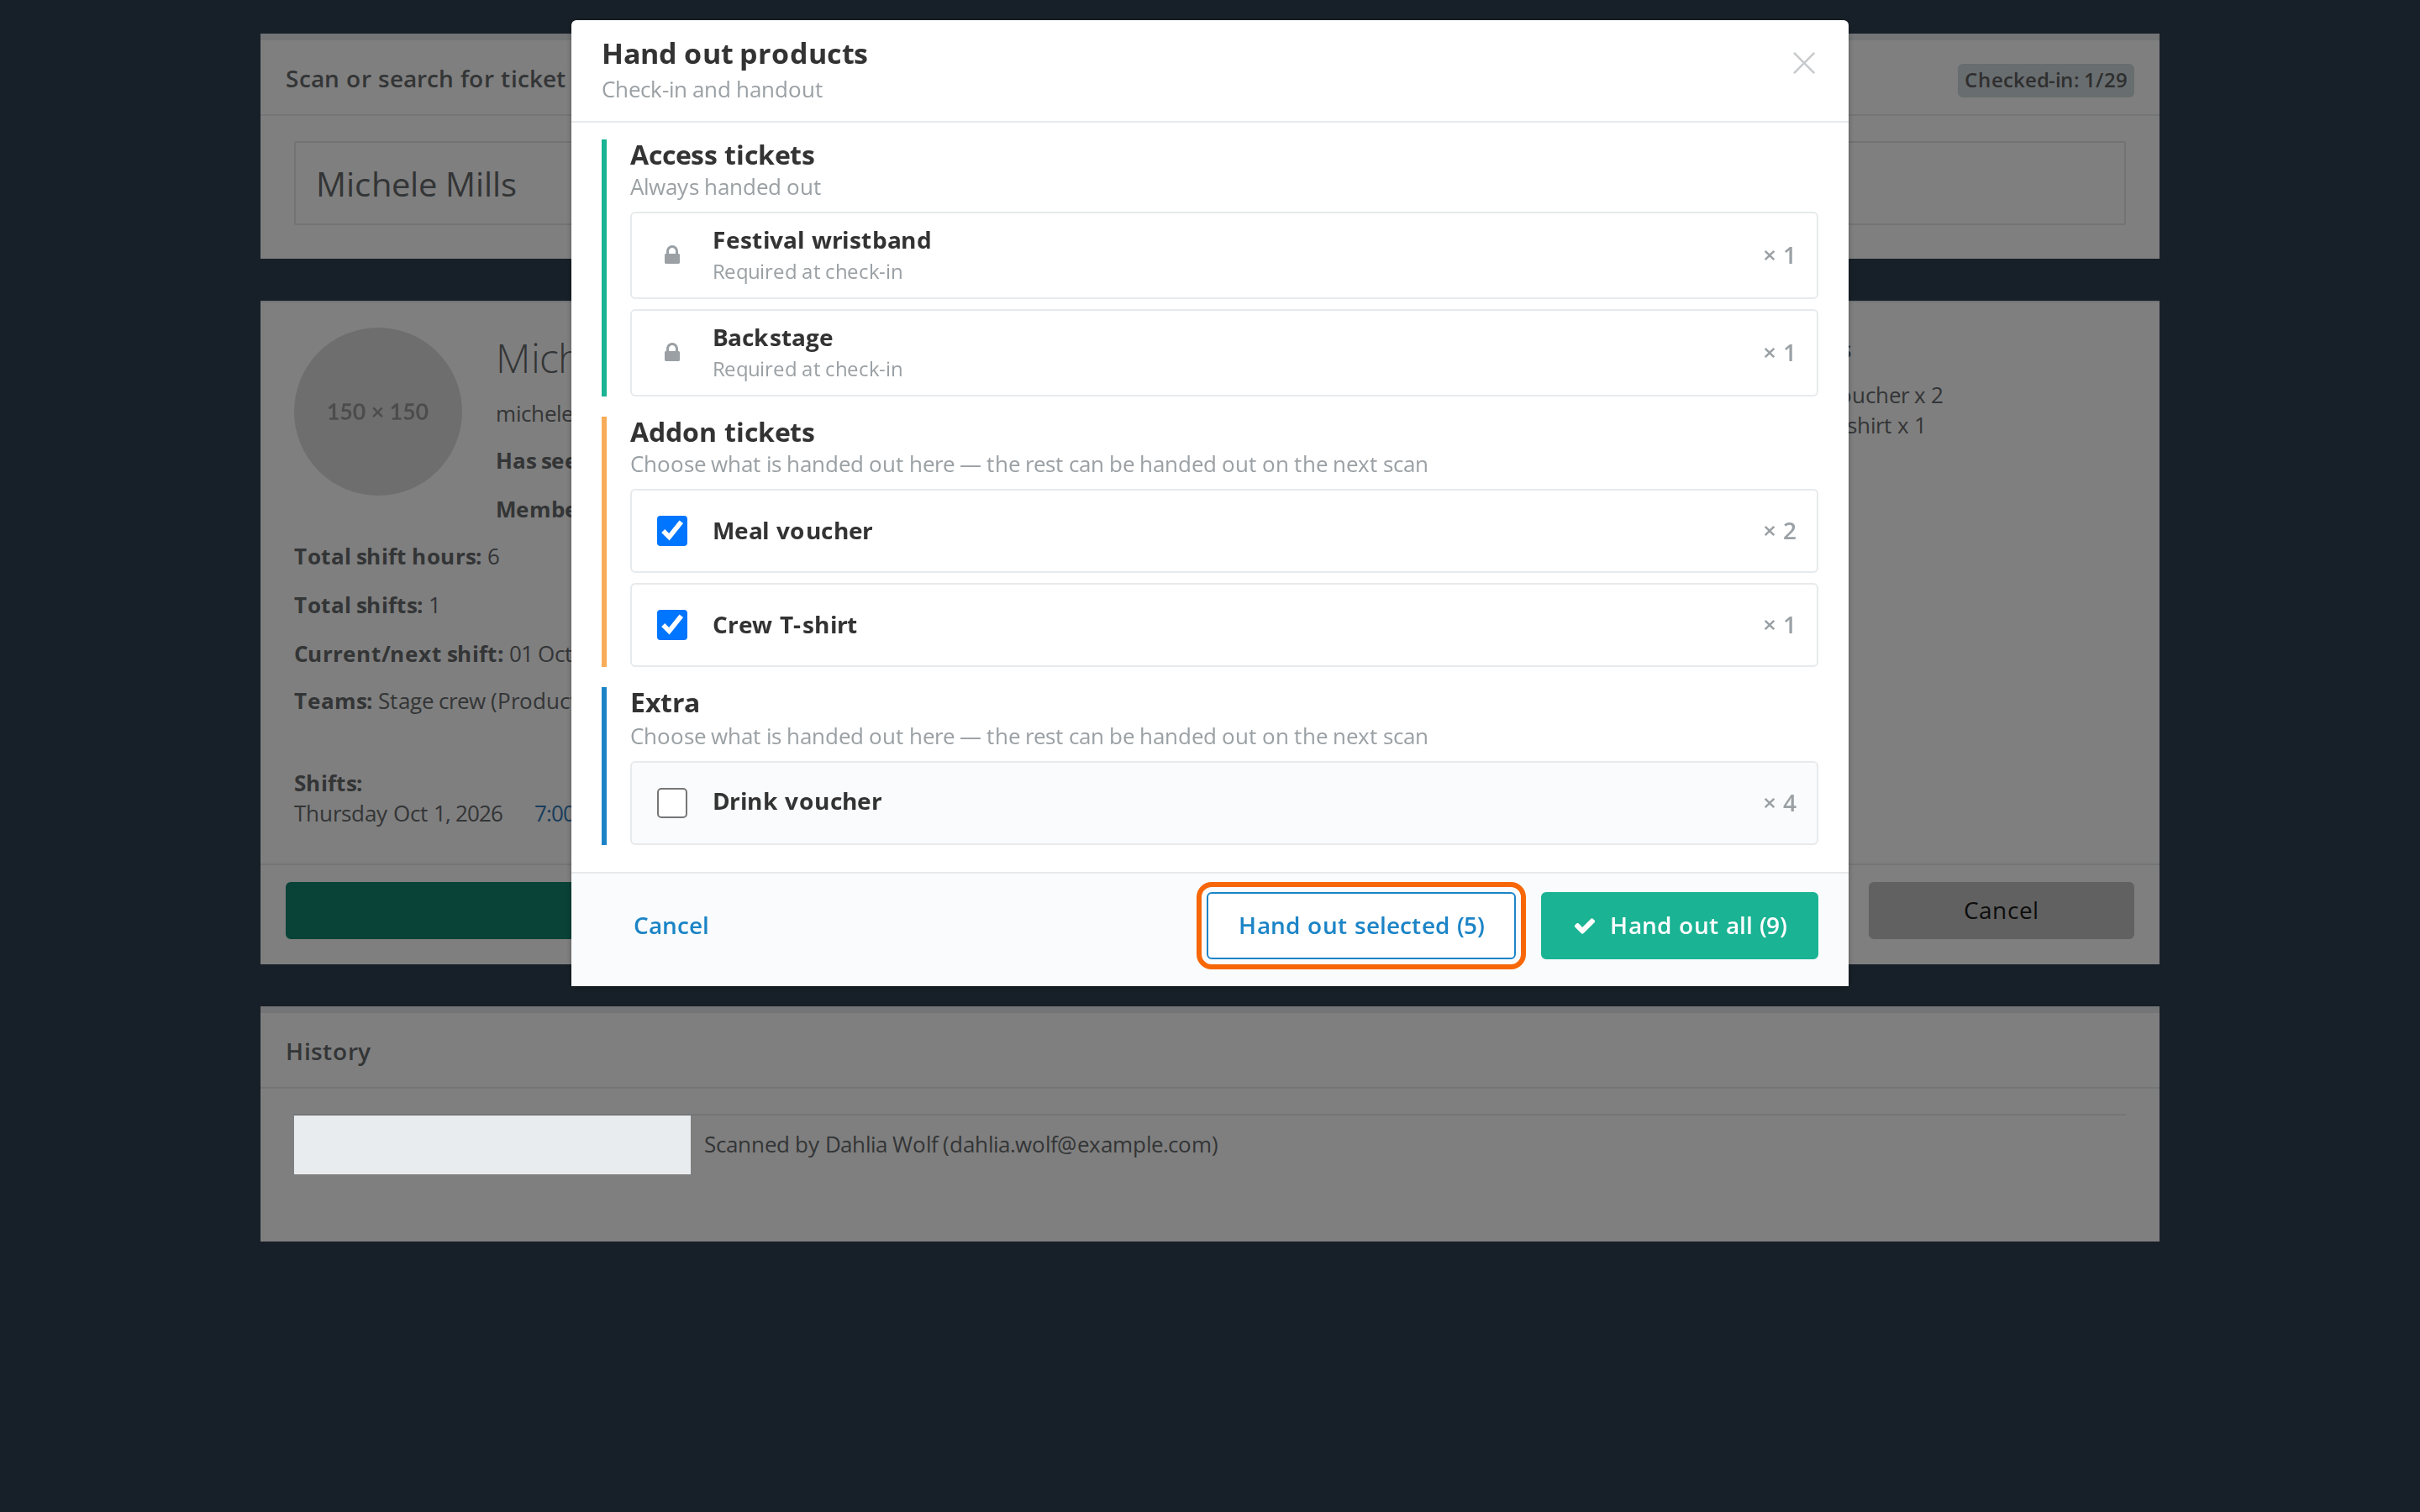
- Scan the person and click Check-in. If the person has anything other than access items, the Hand out products window opens.
- Access tickets are locked and marked Required at check-in. They are always handed out at the first check-in.
- Under Addon tickets, Extra and Items everything is selected in advance. Untick what you are not handing out now.
- Click Hand out selected if you unticked something. Otherwise click Hand out all.
When you scan the person again, what was handed out shows as Handed out, and the rest is ready to hand out. If the person gets new products after checking in, such as an extra meal voucher, they appear as not handed out on the next scan. Once everything has been handed out, the scanner shows Ticket already checked-in.
If the person only has access items, the window doesn't open and Check-in works as usual. Each handout is logged in History as "Handed out by …".
The scanner in the Crewstack app
People with access to the scanner can also scan in the Crewstack app under Profile > Scanner. The app uses the phone's camera for the QR code. If the camera doesn't work, you can type the code in Barcode or QR value and tap Look up.
The screen turns green when the ticket isn't checked in yet and red if it already is. Tap Check in (or Check in again), then Scan another. After check-in the screen turns red with "This ticket has already been checked in." That is expected: the check-in is saved.
Without access, the app shows "Scanner is only available for staff roles."
NFC chips
If Crewstack has set up NFC chips through EventPos for your event, the Connect chip card window opens after check-in for people with chip products. Scan the chip with the NFC reader into the field and click Connect chip to user (or Replace existing chip). Click Continue without chip activation to skip it. See NFC chips with EventPos and RFID, NFC and digital wallets.
Follow the check-ins
Under Reports, admins find:
- Check-ins: how many check-ins each person at the entrance has made, split by product.
- Product check-ins: the checked-in products, which you can filter by period, product and who checked them in, and download as CSV.
Both reports count the products on the ticket now, not what was handed out. See Check-in reports.
Brief the staff
Go through this with the team before opening:
- Log in with your own login and open Scanner.
- Scan, check the name and picture, and press Enter or Check-in.
- A red box means stop: read the message and call an admin if in doubt.
- Use Add note for anything unusual.
- With partial handout: only untick what isn't handed out here.
Check this
- "Ticket not found" for every ticket: are you logged in to the right event and year? Switch under the logo at the top left of the menu.
- The scanner fails or hangs: the scanner needs an internet connection and doesn't work offline. Messages like "Check-in failed. Please check the connection and try again." mean the connection has dropped. Make sure you have stable Wi-Fi or mobile data, and keep a spare device ready.
- Someone at the entrance can't see Scanner: check that the person is on a team, or has a member type, with the Scanner product.
- The Hand out products window doesn't open: check that Enable partial item handout in the scanner is switched on and that the person has something other than access items. In Venue mode the window never opens.
Didn't find the answer? Write to support@crewstack.io.