
Set up the signup form
Build the signup form for a member type with pages, data fields, team selection and the confirmation page, and check that every required field is included.
The signup form is the pages a new person clicks through after creating their account with email and password. Each member type has its own form, and you decide which data fields are asked, on which page and in which order.
If you haven't created member types and data fields yet, start there. See Set up member types. See also Data fields and who can see them.
What the crew member sees
- The pages of the form, one at a time, with Continue at the bottom. At the top it says, for example, Sign up – step 1 of 3.
- The Choose team page, if the member type has Team select switched on, there is a team to choose, and the person isn't using an invite link to a team.
- The Confirm sign up page with the Confirm button. If the member type requires payment during signup, they pay here.
The signup is only complete once the person has clicked Confirm. The person then gets a mail saying the signup is complete, or one saying they're on the waiting list. See Mail templates.
Check the status of all forms
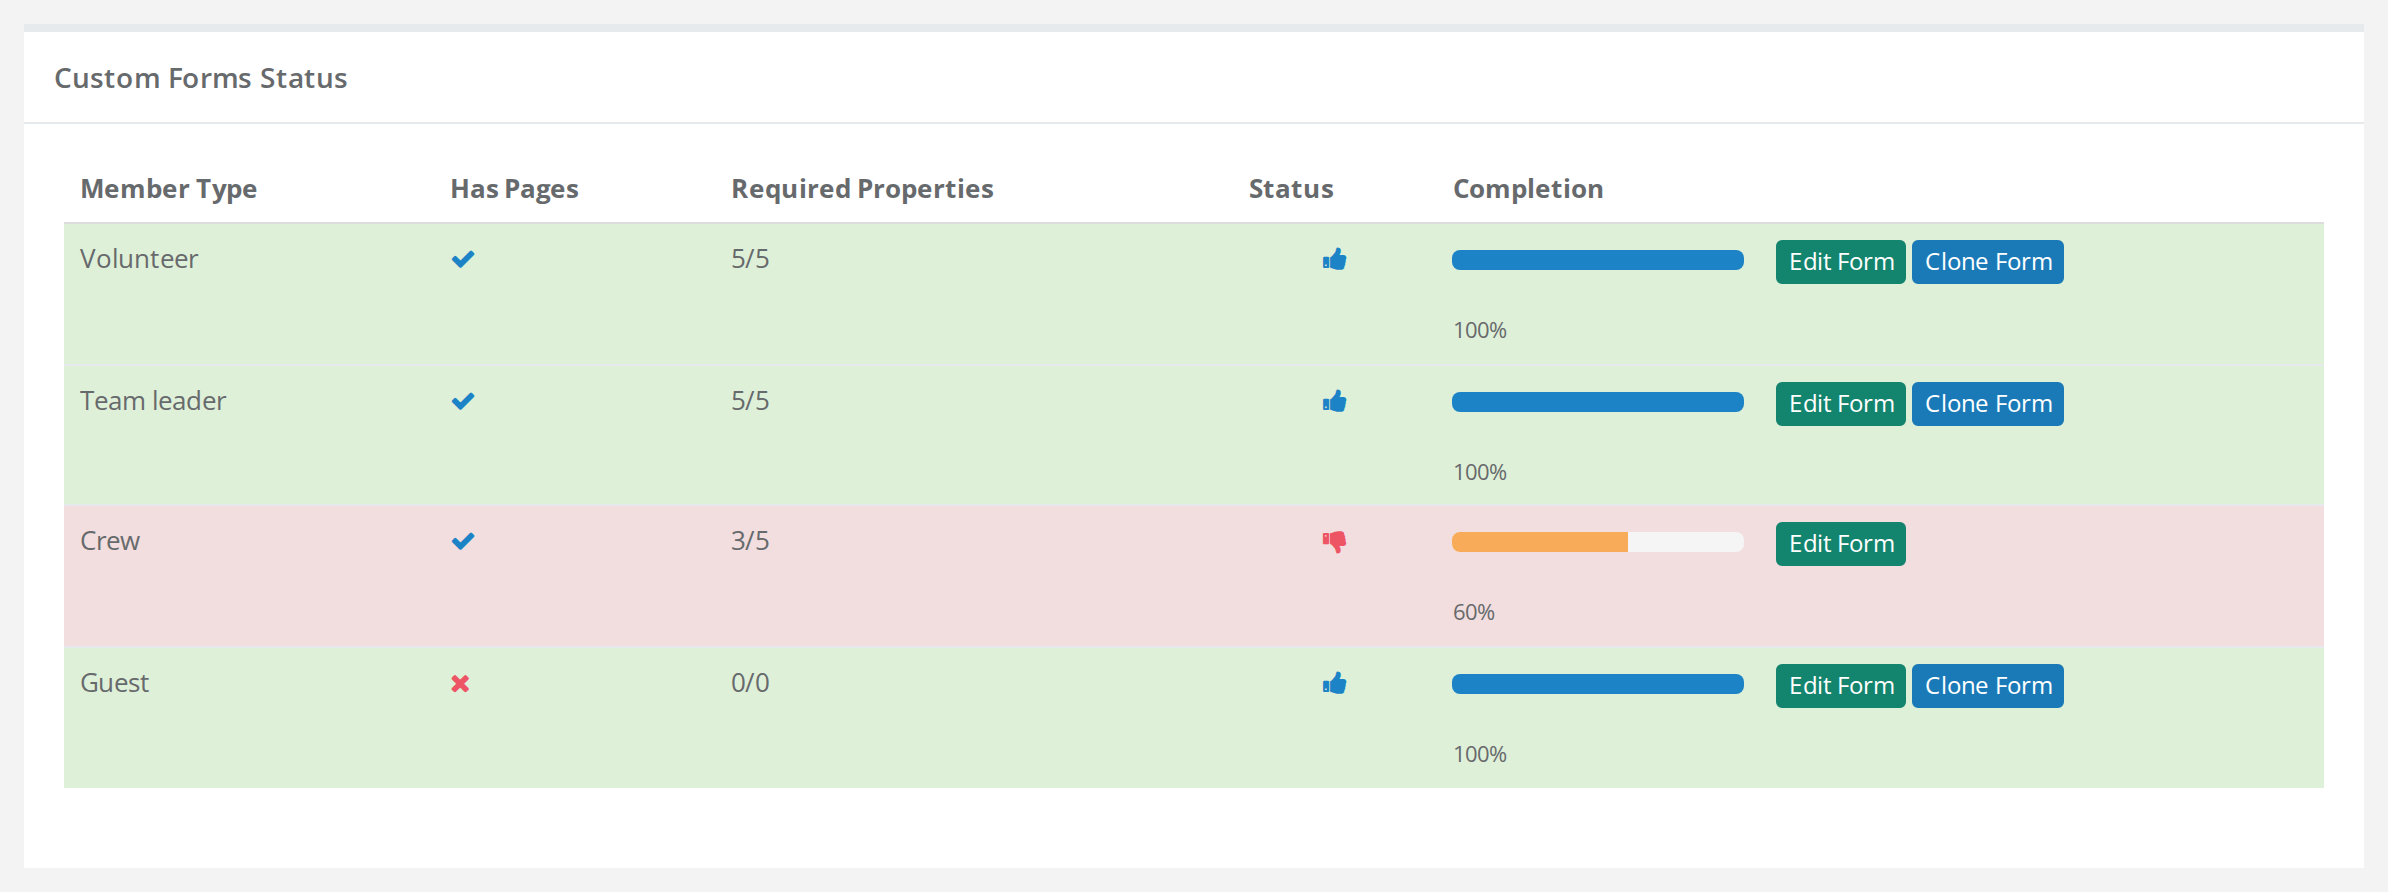
Go to Customize > Forms. The Custom Forms Status table has a row for each member type:
- Has Pages: whether the form has at least one page.
- Required Properties: how many of the member type's required data fields are in the form, for example 3/5.
- Status and Completion: a thumbs up and 100 % when all required fields are included.
The row is green when all required fields are included, and red when some are missing.
Build the form
- Click Edit Form next to the member type.
- Click Add page.
- Write a text in Description. It is shown at the top of the page. If the event has several languages, there is a tab for each language.
- Drag data fields from the Fields list on the left onto the page. Drag them up and down to change the order. Remove takes a field off the page again.
- Make more pages if the fields should be split up. Remove page deletes a page.
- Click Save at the top of the page.
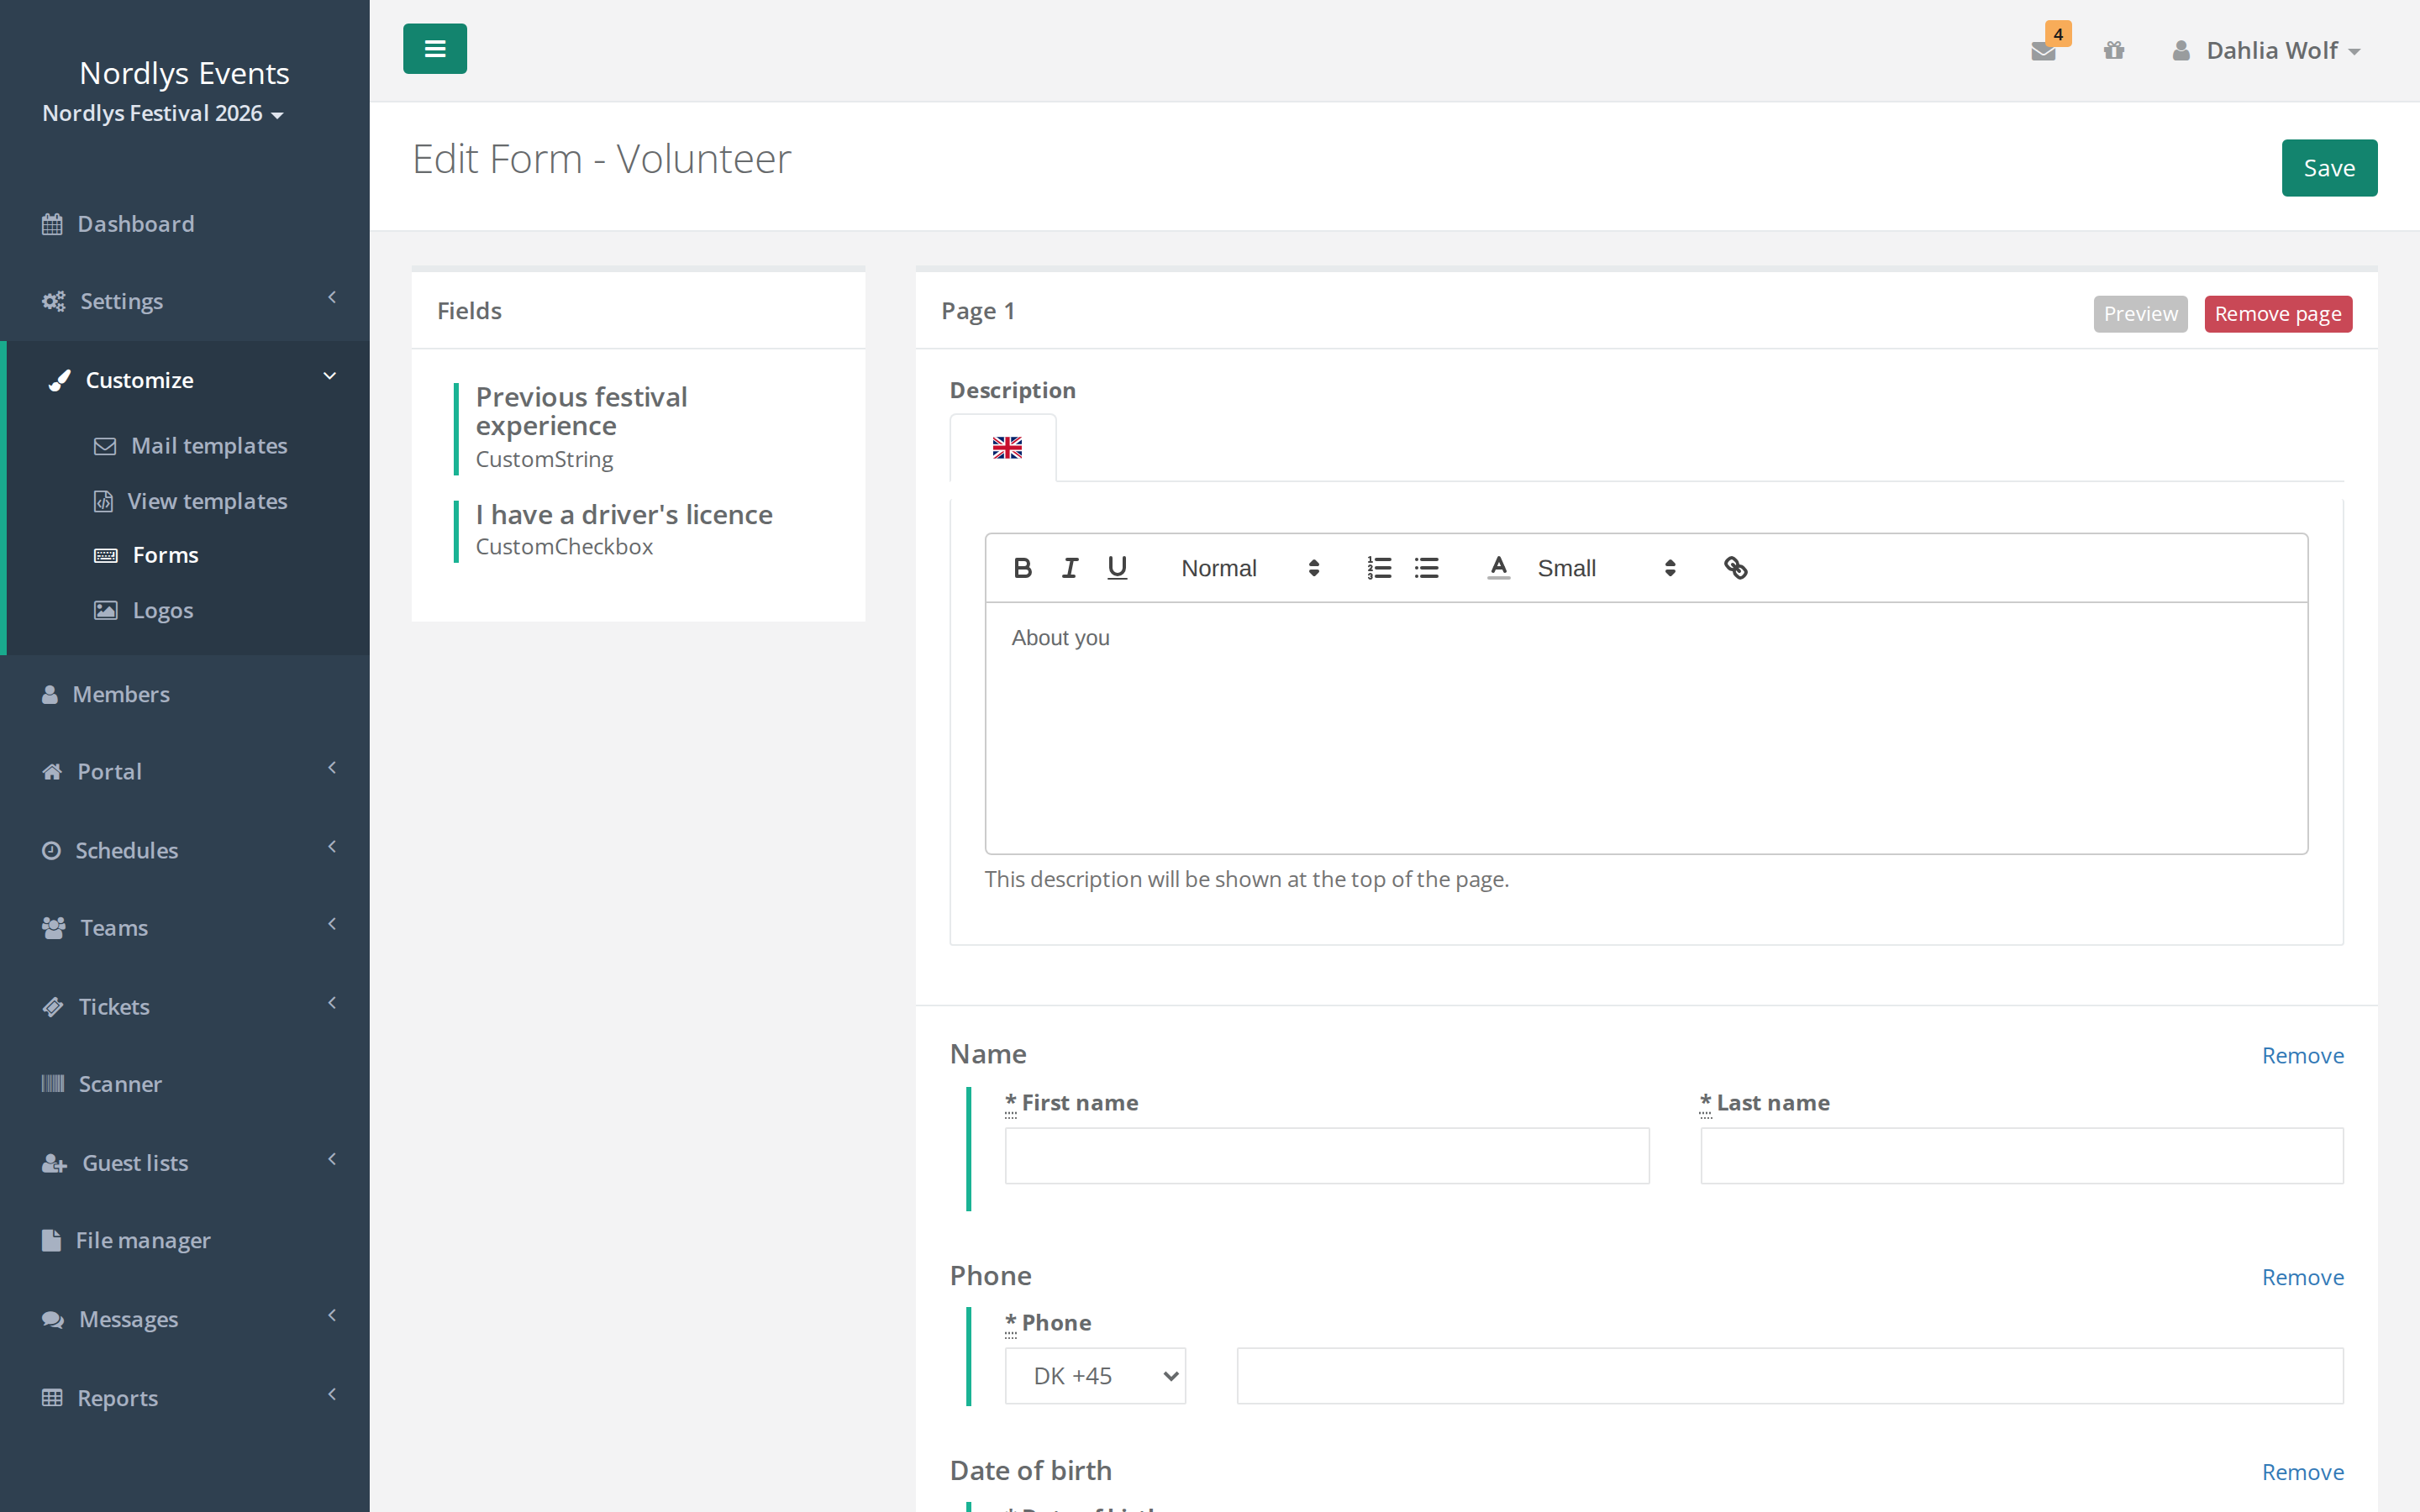
The list on the left only shows the fields the member type uses and that the person can see themselves. Those are fields where Visible to is Everyone or starts with The member itself or Member +.
The two fixed pages
Below Add page there are always two fixed pages. In the editor they are called team_select page and confirm page.
- team_select page is the Choose team page. You can write a description for it. Don't put data fields on it. They count in the status table, but they are never shown to the crew member.
- confirm page is the Confirm sign up page. It is always included. You can write a description and put data fields on it, for example a Terms and conditions field.
Copy a form to another member type
When a row in the status table is green, you can copy the form to another member type.
- Click Clone Form next to the form you want to copy.
- Choose the member type under Clone to:.
- Click Clone Signup Flow.
Pitfalls
- Required fields must be in the form. If a required field isn't on a page, the person isn't asked about it during signup. Instead they get the window We need more information! once the signup is complete. See Crew members are stuck in the signup.
- Fields can disappear from the form. If you remove a member type from a data field, the field disappears from that member type's form. If you change Visible to so the person can't see the field themselves, it disappears from all forms. Check the status table afterwards.
- Conditional fields go after the field they depend on. A field that depends on another field must be on the same page as that field or a later one.
Didn't find the answer? Write to support@crewstack.io.